Product guide

From first launch to a useful private vault.

A practical walkthrough for setting up Personal Document Vault, adding files, finding information, and keeping your collection healthy.

01

Create your vault

Choose a strong vault password you can remember. The password unlocks the encryption key used to protect your document contents and private metadata. Save the recovery key shown during setup somewhere separate and safe. Fictional starter profiles and documents are optional.

02

Set up people

Use the user icon to edit your local Self profile, or open People to add and edit household members. Profiles stay linked to their documents when names change. An optional profile email is local contact information only; it is not verified or used for password recovery.

03

Add a document

Select Add Document, choose a supported file, add a clear title, then select its category and owner. Dates, tags, identifiers, organizations, and notes are optional but make future searches much more useful.

Add required information first, then expand More details only when useful.
04

Review before saving

Confirm the file and information, then select Save to Vault. The app encrypts the selected file and sensitive metadata before committing the record.

05

Find and preview

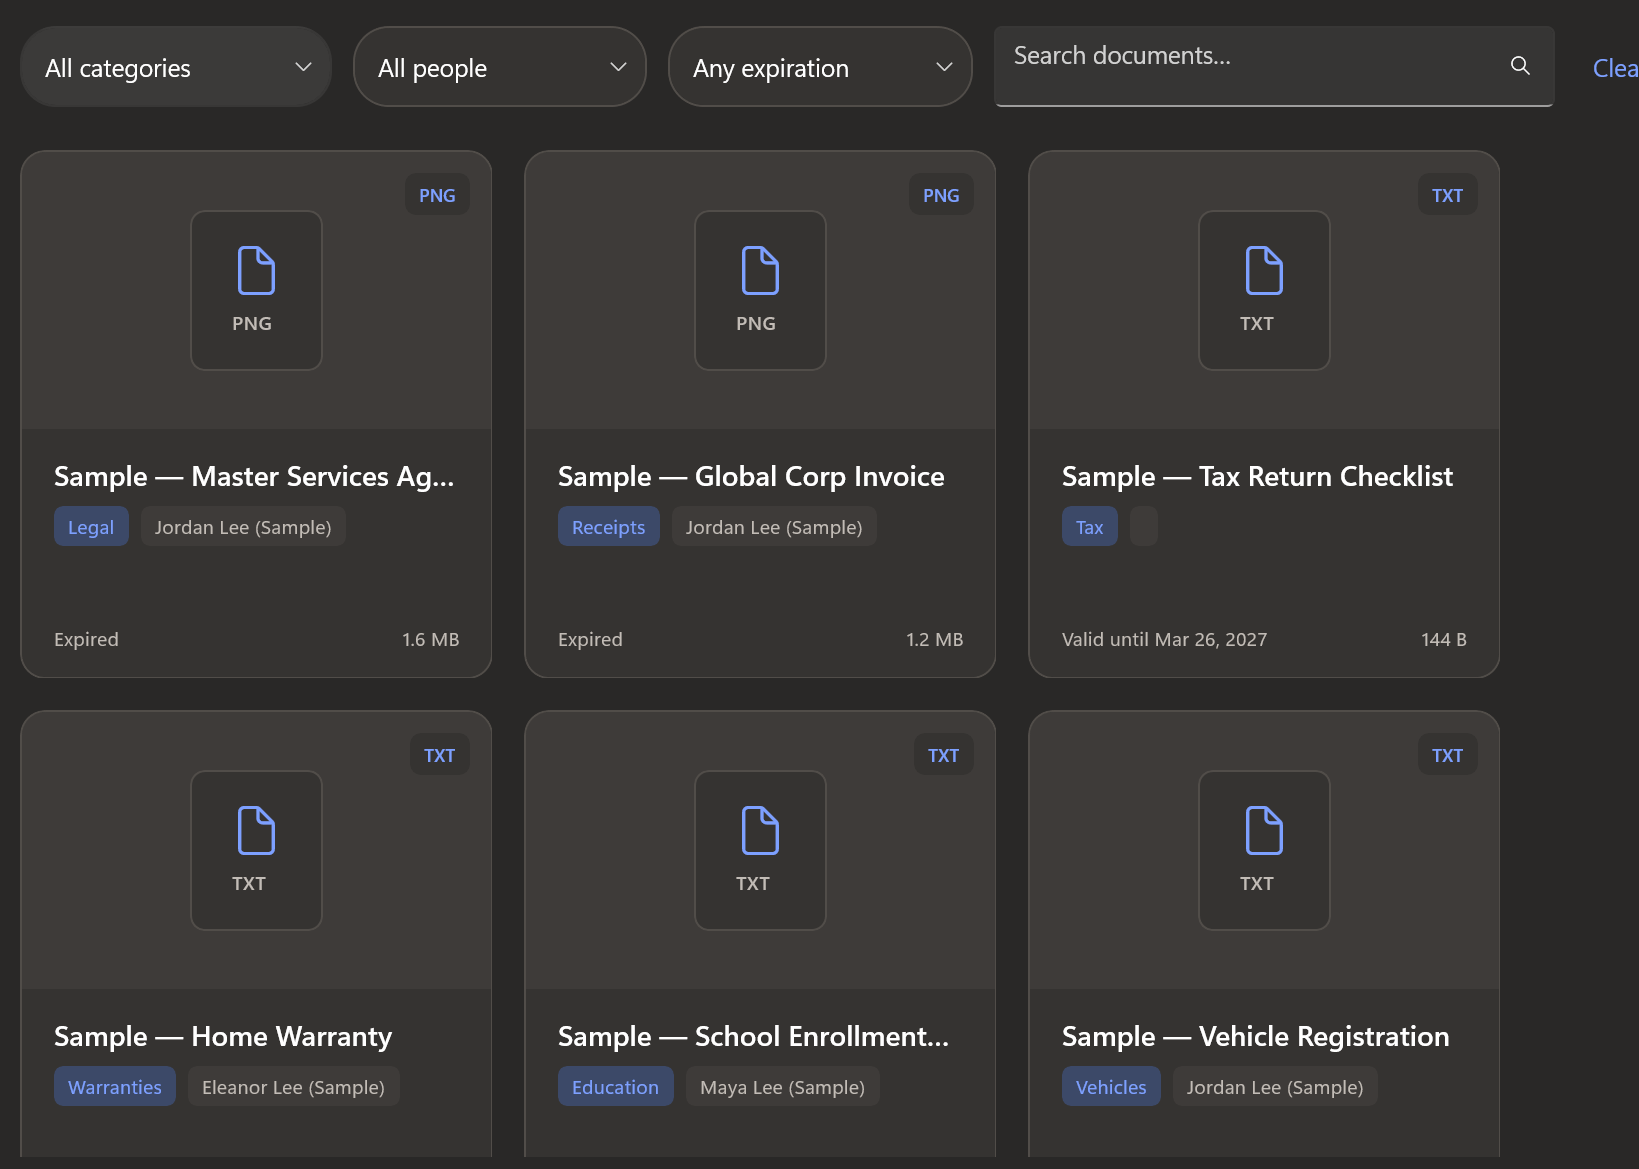
Use the global search or Documents filters. Grid view gives image and PDF previews; List view uses compact file-type icons. Open a record to preview, zoom, pan, favorite, export, or move it to Trash.

Document library in grid view
Visual Grid view keeps previews and key metadata together.
06

Edit and renew

Open a document and use Document actions to edit its saved details without replacing the encrypted original. From an expired item, choose Renew document and save a new future expiration date.

07

Track expirations

Add expiration or renewal dates when relevant. The Home and Expirations screens group overdue and upcoming items so you can act before a passport, policy, warranty, or registration lapses.

Backup and recovery

In version 1.0.1, create an encrypted backup from Settings and save it outside the working vault folder. Keep the password used when that backup was created, or its recovery key, separate from the backup. Changing your current vault password does not change the password on older backups.

Choose Restore backup from setup, the lock screen, or Settings. Select the backup and a parent folder, then provide its password or recovery key. The app verifies the backup and restores it into a new folder without replacing your current vault. Choose Use restored vault and close, then reopen the app to unlock the restored copy. Earlier-format backups require the original vault to be unlocked; create a new portable backup while you still have access.

If you forget your vault password but have saved its recovery key, use the recovery option on the lock screen to set a new password. There is no email password-reset service or Windows Hello unlock in this build. If both your password and recovery key are lost, the publisher cannot decrypt the vault for you. Never send either credential to support.
Preview support

Review common formats without leaving the vault.

The original remains encrypted. Preview content is decrypted only while your vault is unlocked.

Quick answers

Frequently asked questions

Does the app upload my documents?

No. Documents stay on your device unless you explicitly choose to create an encrypted backup at a destination you control.

Can email reset my vault password?

No. A profile contact email is stored locally and is not verified or connected to recovery. Use the saved recovery key to set a new password from the lock screen. If both the password and recovery key are lost, the publisher cannot decrypt the vault.

Can I delete the starter examples?

Yes. Starter profiles and documents are fictional sample data and can be moved to Trash or removed when you no longer need them.

What happens when I move a document to Trash?

It leaves normal views and can be managed from Trash. Use permanent deletion only when you are sure you no longer need the encrypted file or its metadata.

Why should I add expiration dates?

Expiration and renewal dates power the Action Required and Expirations views, making time-sensitive paperwork easier to manage.